
How To Clean & Protect Glass – The GYEON Way
Posted by JEFF MCEACHRAN

Serving as your direct viewing connection to the outside world while driving, keeping your glass clean and maximizing your visibility is crucial to keeping you and your passengers safe. Today, we’ll discuss how to clean and protect the glass on your vehicle to make future maintenance washes easier as well as make driving in inclement weather safer. So, let’s get right into the 3 glass-specific offerings within the GYEON lineup – View, QuickView, and Glass+.
Q² View // Long Lasting & High Repellency

The original entry from GYEON into the world of glass protection – Q² View is a two-part system that includes everything you need to both deep clean and protect the glass on your vehicle. Designed with maximum repellency and longevity in mind, Q² View is the protectant of choice for those who want the most durability and hydrophobicity.
The first step in applying Q² View is going to thoroughly clean and decontaminate the glass – ideally, you’ll want to fully wash and dry the vehicle before beginning work. Shifting focus onto the glass, you’ll want to grab a clay bar, Q²M Clay Lube, and clay the surface of the glass. Once dry, it’s important to make sure that there is no remaining residue left over, and to do that, you’ll want to do a proper wipe-down with Q²M Prep. Now that your glass is clean and prepped, the first bottle you’ll reach for inside of your box is labeled “Cleanse” – Q² Cleanse is going to be a special formulation of bonding agents paired with a mild abrasive that is meant to deeply clean into the pores of glass and provide an optimal surface for Q² Repel to bond to. Be sure to give the bottle of Q² Cleanse a good shake to ensure proper product emulsification and then there are two ways it can be applied to the glass:
- Using the included felt applicator block in the packaging
- Using a dual-action polisher using a compatible felt pad or extra firm pad density
The goal with Q² Cleanse is to apply enough pressure to make the product effective, but also to apply in the most even layer possible. A proper application should leave you with an even and light haze on the glass. Once applied to the glass, you’ll want to leave it on for about 15-20 minutes to ensure the bonding agents have properly primed the surfaced – remove with a dry low-pile towel like the BaldWipe EVO.

Once removed, you’ll grab your bottle of Q² Repel and the included applicator block and suedes – apply a generous amount of product to the suede and begin applying to the glass with moderate-light pressure in circular motions. We want to ensure the most even layer possible here, so be sure to spread the product evenly. If your glass has been prepared properly, you should hear squeaking feedback while applying – this is an indication that you are using adequate pressure and that Q² Repel is filling the pores of the glass. Once you’ve applied a full layer onto your windshield, you’ll want to leave it to cure on the surface for 15-20 minutes; during this wait time, we can shift our focus to the wiper blades to help avoid the dreaded wiper judder.
Start by thoroughly cleaning the wiper blade rubber using a microfiber towel and our Tire Cleaner. Once clean, take a small amount of Q² Repel on a suede cloth and apply it to the wiper blade rubbers. Once complete, you can elect to follow the same process on the glass around the vehicle, or you can elect to apply another layer to the windshield – the goal is to use the entire bottle of Q² Repel per vehicle (depending on size). If you’re electing to apply another layer onto the windshield, instead of wiping off the original layer, you’ll instead begin applying the second layer right over top – allow it to cure for another 15-20 minutes. Once complete, the final stage will be removing any leftover material with a dry microfiber towel.

Wait at least 1 hour before introducing to water or elements. You’ve now just installed a premium, durable, and super hydrophobic glass repellant that boasts a full alcohol tolerance to allow it to be used alongside your washer fluid. It is important to note that if your washer fluid contains hydrophobic additives or other repellants, this could affect the performance of Q² View; best to just use regular washer fluid with no protectant additives. You can expect 12+ months of durability out of Q² View depending on climate and cleaning habits. If you’d like to watch an install of Q² View, check out our product guide in this episode of The Detailing Guru.
Q² QuickView // A Quicker View

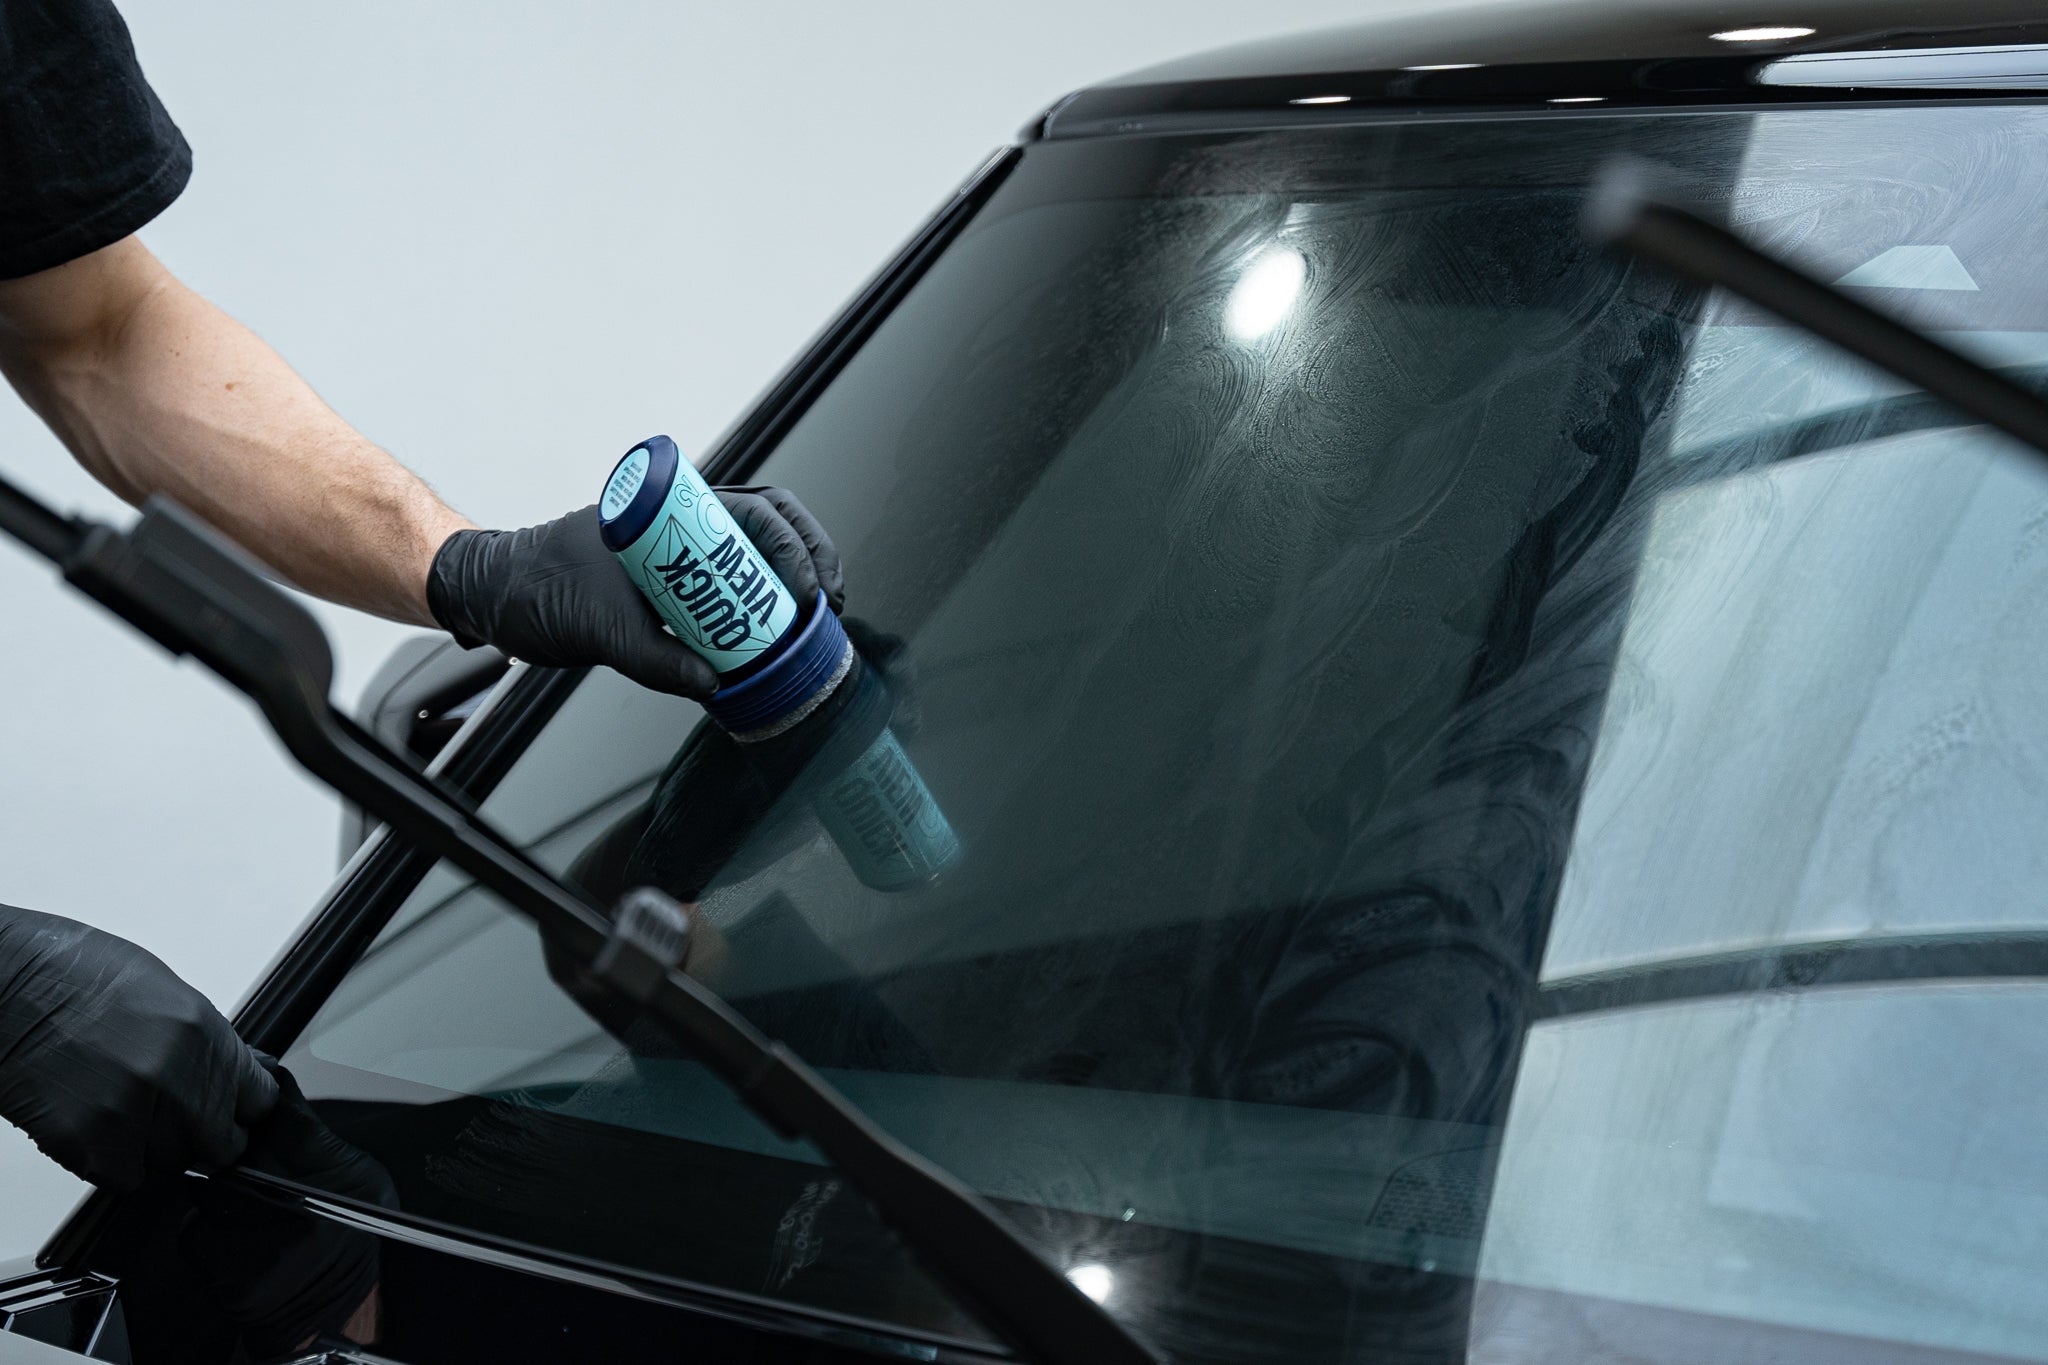
It’s honestly all in the name – for those who are looking for a quicker option to the full process of Q² View, we introduced Q² QuickView. Debuting in 2020, Q² QuickView has rapidly become a fan-favorite and a top-seller of ours – and with good reason. QuickView is going to offer the same full-alcohol tolerance and hydrophobicity found in Q² View but in a convenient all-in-one container/applicator combo. Now it all can’t be sunshine and rainbows of course, so the catch is that to create a quicker and easier-to-use alternative, QuickView’s durability rating will be half of what you would get with Q² View. 6+ months is the official durability rating but depending on several factors I’ve seen it both last much longer as well as shorter. The key to extending the longevity of any repellant, coating, or protectant is to keep it clean. A clean surface is a happy surface – and that applies to all surfaces of your vehicle. Applying QuickView is remarkably simple; start by cleaning the glass thoroughly with either a glass cleaner or by washing the vehicle. Claying the glass is optional when it comes to QuickView but will certainly only help.
Once you have clean glass, simply unscrew the cap, turn the bottle applicator side down, and place it on the glass; give the bottle a light squeeze and the liquid should begin saturating the applicator. Following the same principle of Q² View, apply in circular motions and spread the product evenly. You should see a nice and even layer of product going on the glass that should appear as a thin, hazy layer. If you’re seeing droplets of product form on the glass, you’re using too much QuickView. Once an even layer has been applied, QuickView should be allowed to cure on the surface for 5 minutes, but can even be left on for upward of 30-45 minutes; this makes it the perfect choice for those who want to coat all of their vehicle glass in one go. Simply start with the windshield, work your way around the car, and by the time you reach the front it should be ready to remove.
The removal of QuickView is quite easy as well. You’ll need two low-pile towels like the BaldWipe EVO with one of them being damp. Start by wiping the residue off with the damp towel and then follow up with the dry towel to buff it to a crystal-clear shine. That’s all there is to it – depending on the size of your vehicle, you now have fully protected glass around your vehicle in less than an hour. If you’d like to see an in-depth application about QuickView, check out the video from the product unveiling here – Q² QuickView GYEON Show 2020
Q²M Glass+ // The New Kid On The Block

Debuting at SEMA Show 2022 in fabulous Las Vegas, Glass+ takes the already great Q²M Glass Cleaner and pairs it with the hydrophobic and slick elements you’ve come to know and love from GYEON. Usable on both the interior and exterior glass surfaces, Glass+ will leave behind a slick and anti-static glass surface that helps keep your glass clean longer as well as make future cleanings much easier. Although it might be the new kid on the block, it will quickly show you that it’s “got the right stuff” to make it a staple in anybody’s wash routine. Whether you’re using it as a quick way to add quick protection to your glass or boost the hydrophobic properties of Q² View or QuickView, Glass+ should easily find its way into your wash routine. It even works on plexiglass and polycarbonate surfaces for cars equipped with convertible tops, track cars, and more! To use, a little bit of product goes a long way and it’s very easy to use; in most applications, all you should need is 1-2 sprays into your microfiber towel, wipe onto the surface as you would normally with a glass cleaner, flip to a dry side of the towel and remove any leftover residue. If you experience any unwanted streaking, film, or haze, simply give the area a wipe with a damp microfiber and use a dry towel to remove any water left on the surface. It should go without saying, but all 3 products should only be used on cool glass and never in direct sunlight.

Maximum Clarity Made Crystal Clear
Though it might be easy to focus on paint coatings, wheel coatings, and leather coatings, the glass of your vehicle is among the most important safety features of any automobile. Taking proper care of your glass cannot be underestimated, and we have expertly crafted 3 choices to fit into anybody’s detail collection in any climate. Now that you know about each of GYEON’s glass offerings, which one will you choose? Let us know what you’d like to see us write about next – give us a like on Facebook and follow us on Instagram and TikTok to stay up-to-date with all things GYEON! You can also subscribe to the official GYEON YouTube channel for product guides, unveilings, and more. See you all in the next blog entry!
TAGS:
